
The first thing I did, which is pretty common whenever I try a new art package (or even a new pen in the real world) was draw some lines to see what all the tools did. Scribbles, hatching, straight lines, curved lines, very rough faces; nothing worth showing (or even saving). But then it's time to try to do something to see if I like it enough to spend my $80 on it, and since I'm all about skulls right now:

Which took about 10 minutes. It's very sketchy, and the teeth are a mess, but I did it from memory, without any reference, so it's not too terrible right? If you're wondering why the top of the skull is missing it's because I drew the initial lines too high and had to move the whole thing down (more on this later). So the pen tool is nice; time to check out some other stuff:
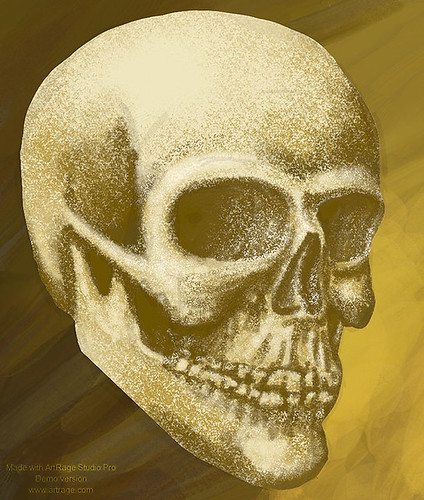
Done using the chalk tool mostly. The background was Oil paint, including the backing colour of the skull (actually, that might have been thick watercolour, I can't recall). This was about 30 minutes work, maybe 40 (including the time for the initial sketch). 30 minutes later I had this:
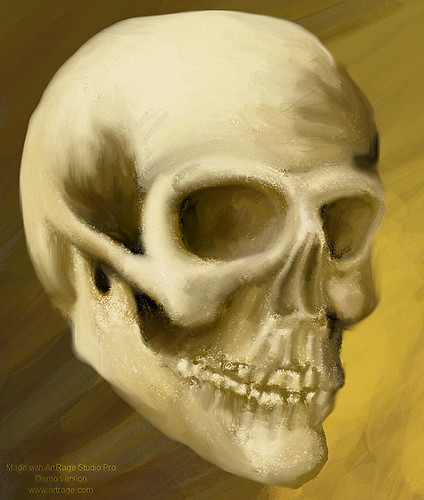
Which isn't all that much improved for the extra time I spent on it. Basically it's the previous image as a base and than painted over using oils and felt-tip pens before being smudged around with the palette knife tool. I don't particularly like the result, but that's due more to my shortcomings rather than anything wrong with the package, which I shall almost certainly buy in the near future. Expect to see more things from Artrage from time to time.
So I'm fairly pleased, if not with the final result, then the overall progress it shows, given that this was done without any reference and in a package I've never used before. Artrage is nice because it simulates real media fairly well (though not perfectly) but gives a lot more options than the real world for how to use them. real Oils take an age to dry, in Artrage you can chose for them to act like that, or to dry instantly, as well as choose if your brush should be cleaned off right away or not. For the most part the various tools act as you would expect, with only the crayon not really looking like I would expect (Though this may be due to the settings I used). Of course with that you also get some classic; if fairly basic digital tools, such as an undo stack (the main advantage to digital anything in my opinion), and a layers system (think of sheets of stacked acetate if you're not familiar with them). Finally there's a transform tool that allows you to move things around within the frame, just as I did with my skull here.


No comments:
Post a Comment